Whether you are an experienced moonshiner or a complete novice, this tasty cornmeal moonshine recipe will yield great results you will want to share with your friends and family!
When it comes to learning the basics of moonshining, getting a good grasp on making corn moonshine is a must. This simple step by step recipe is a great basic to learn the ins and outs of making a mash, fermentation, distillation and fractionation of your first batch. Having a great corn moonshine recipe under your belt will help novice ‘shiners gain the know how to go on to more complex spirits.

A Drink with a lot of History
The practice of moonshining has had a resurgence in popularity since the Discovery Channel hit Moonshiners. However, the practice of distilling your own spirits is certainly not new.
In the United States of America moonshining has its roots in frontier life in Pennsylvania and other grain producing states. At the time farmers got into the habit of distilling excess grain so it would not spoil. In fact, whiskey could be used as currency at this time.
Unfortunately this practice led to a ‘whiskey tax’ and a subsequent rebellion that cost many lives. Moonshine once again gained popularity in 1920 when prohibition halted the production and consumption of alcohol in the United States.
In fact the term moonshine refers to creating something ‘by the light of the moon’ to avoid detection.
The Birth of NASCAR
Moonshiners worked with bootleggers who were used to transport the illicit spirits. Bootleggers began modifying their vehicles for heavy loads and to increase their speeds. This was done in an effort to avoid capture from local authorities.
When the 18th amendment of the Constitution of the United States was repealed in 1933, bootleggers held regular races to keep their skills sharp. It is rumored that this led to the National Association for Stock Car Auto Racing (NASCAR). Many moonshine ‘runners’ or ‘bootleggers’ went on to become notable NASCAR drivers.
Getting Started with the Right Equipment
Many rumors around the production of moonshine center around the danger of producing the spirits without proper equipment, in particular using car radiators in the distillation process.
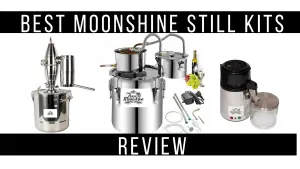
Check out the Magnum All-in-One Still kit. This kit acts as both a fermentor and a still, is easy to use and even comes with a water pump and hydrometer! There is not easier system to make quality spirits from the comforts of home.
At How to Moonshine we want our customers to get great results each time. This means using quality products and equipment to produce great results. We know that for many people moonshining is a fun way to create spirits at home. That is why we have a Moonshine Starter Kit so making your moonshine is simple and fun.
Cornmeal Moonshine Recipe Equipment
The first step to create a great yield of moonshine is to gather all your necessary equipment so you have it on hand. If you do not have an all-in-one kit, it is important to have a good cooking thermometer on hand. Temperature is an important element to closely monitor during the moonshining process.
Another important consideration is cleanliness. Making moonshine is just good science. It is a simple process of turning grain into sugar and then sugar into alcohol. However, contamination is an easy way to ruin your results. It is important to make sure you are working in a clean area with sanitized tools.
Equipment Needed to Make Cornmeal Moonshine
Or
- Large stainless steel cooking pot
- Long spoon
- Fermentation tub with lid
- Siphon
- Air lock
- Distillation system
- Cheese cloth
- Mason jar
Optional: iodine
Making a Yeast Starter:
Heat ½ cup of water to 110°F and place in a mason jar.
Add in 2 packages of bread yeast and 1tsp of sugar and stir well to fully incorporate.
Let your yeast starter rest. You should notice a ‘yeast cake’ form on the top of the water. This process gives your yeast a good ‘head start’ and allows fermentation to begin right away.
Adding your Yeast
Before you add the yeast to your mash you need to bring the temperature down. This can be done in one of two ways: you can use an immersion chiller or simply leave the mash out to rest and cool for a few hours.
We suggest using an immersion chiller if possible because it reduces the likelihood of bacterial contamination during the cooling process.
Once your mash has reached 70°F you are ready to add the yeast to your mash but first you need to remove the solids and aerate.
Use your cheesecloth to remove the solids from the liquids. Simply place the mash in the cheesecloth in small batches and squeeze (with clean hands) to remove as much liquid as possible. By making these batches small you will be able to recover as much liquid as possible and make your yield larger.
Once you have your liquid separated, it is time to aerate your mash. Simply pour from one sanitized bucket to another from a good height to create bubbles in the mixture. These bubbles will help the yeast to work and are necessary for proper fermentation. Pour back and forth about 10 to 15 times.
Once the mash is properly aerated, add the entire yeast starter to the mix. Place in the fermentation bucket with an airtight lid and an airlock.
The Fermentation Process
Once you have placed your mash in a cool dry area leave it to ferment between one and three weeks. There are a few ways to tell if the process is complete. One way is to look for bubbles. If there are bubbles present, the mash is still fermenting.
The second is an iodine test. To do an iodine test simply place a few drops of liquid from the mash on a white plate. Add several drops of iodine. If the liquid turns blue, there are still starches and proteins present in the mash and you need to continue to let your mash ferment.
Distillation
Once your mash is finished fermenting you are ready to distill. While the distillation process will vary depending on your individual still unit, there are a few best practices that should always be in place.
The first is that you want to make sure to run your mash through a cheesecloth to remove any solids. Solids can burn during distillation and compromise the batch quality.
The second is to make sure you are using a freshly cleaned and sanitized still. Even if you cleaned your unit after your last batch, it is still important to clean before each use, especially if your unit has been sitting for a while.
Lastly, and most important, you need to learn how to separate your batch according to fractions. This is important since the entire batch is not fit for consumption. With each batch you make, you will become better at determining the individual fractions, getting larger yields and better quality spirits.
Your Yield will be Separated into:
Foreshots: first 5%of your batch. It cannot be consumed and needs to be discarded immediately
Heads: Second 30% of the batch is known as the head. It has a distinct acetone-like smell and it should be discarded as well.
Hearts: The ‘heart’ of the run is the spirits you want to collect for consumption. This makes up about 30% of the batch. You will notice the acetone-like smell is replaced by a sweet smell. This run will make up your yield.
Tails: The tails make up 35% of your batch and includes the leftover proteins and starches that were not burned off during the distillation process. Save this batch for a second distillation process. You will know it is the tails because the liquid will have a distinct oily appearance.
Just like every process, when it comes to ‘shining, practice makes perfect. We would love to help you along your moonshining journey. Check out our fun recipes, quality products and read our reviews!